

Does anyone else have a big ol' wall like this just waiting for something? Trying to figure out a game plan for what that "something" is can be quite daunting. So I just thought I'd throw out one idea, out of so many out there for you to think about and try. Here are the steps I took to tackle this project.
1. Figure out all my options and visual and research to help narrow down to one. In this case, I thought I could go with either a picture grouping on either side of the tv or one big gallery wall. I looked at pics of both and decided with the gallery wall to best unite the whole wall. My research also helped provide inspiration from other blogger/decorators: Emily A. Clark, Isabella and Max Rooms.
2. Next, I started gathering frames. I hit a sale at Salvation Army and got quite a few of these there for only $1 each. I just touched them all up with a bit of black spray paint and they were good to go. A couple I had just sitting around and the big one I got on the clearance rack at Ikea for $3. I also got a few packs of these Command 17204 Medium Picture Hanging Strips, 6-Sets
3. You know how some gallery walls just look ummmm....off? Well, since that wasn't the look I was exactly going for, I took the extra step and made cutouts for each piece I had to put up. I just taped up the pieces with masking tape. This way I didn't have to do all the visualizing in my head and I could make sure it all was going to look straight.

4. Last, I put in my pics and hung with a level. The only nail hole I made was for the large picture. I had a hard time deciding what to put in my pics...and whether to do color or black & white. I decided to take pics from our vacations and put them in....that allowed for some landscape shots and some with the family, but all tied together with a theme. I may change them to black & white but for now I am loving the colors and how they brighten up the room. (And no, I didn't paint in between shots...it's just the difference between flash shots and night and natural light shots!)
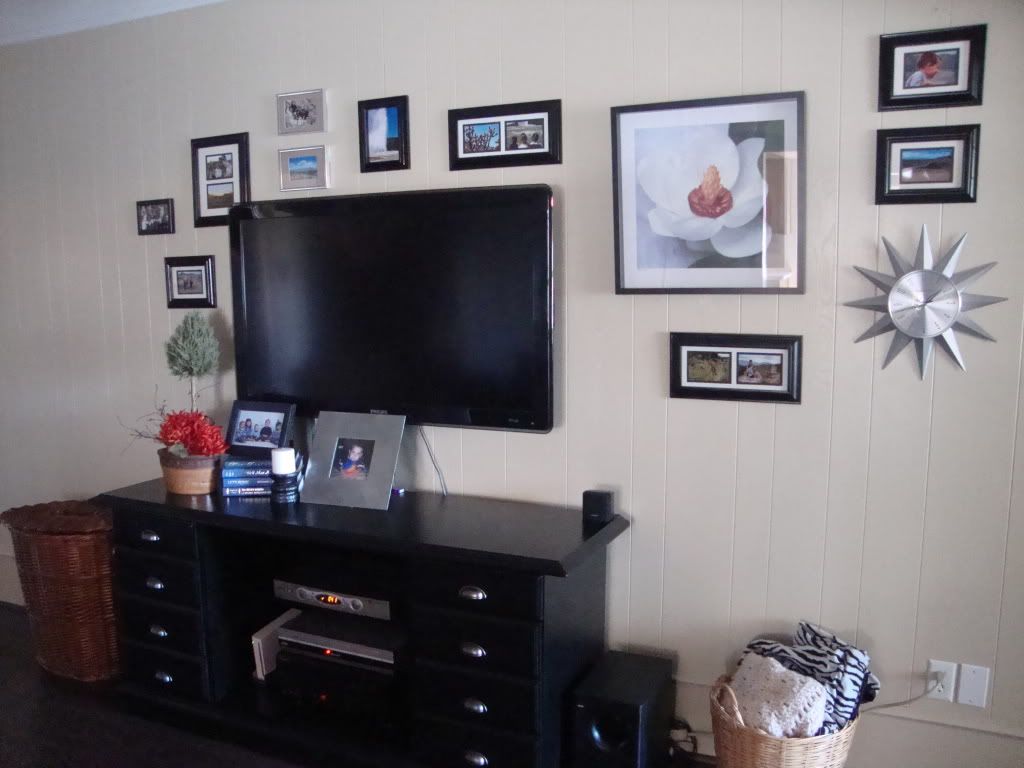
Sooo....for under $20 I have a wall that has some personality! I'd love to hear what you think about this mini transformation!

Loving your blog Shera :)
ReplyDelete